


Set Up Laravel Admin Panel with Backpack in Just 5 Minutes (Quick Guide)
Hello Everyone In this blog we will show you how can setup admin panel in laravel in just 5 minutes, yah you heard it right, in just 5 minutes using laravel backpack
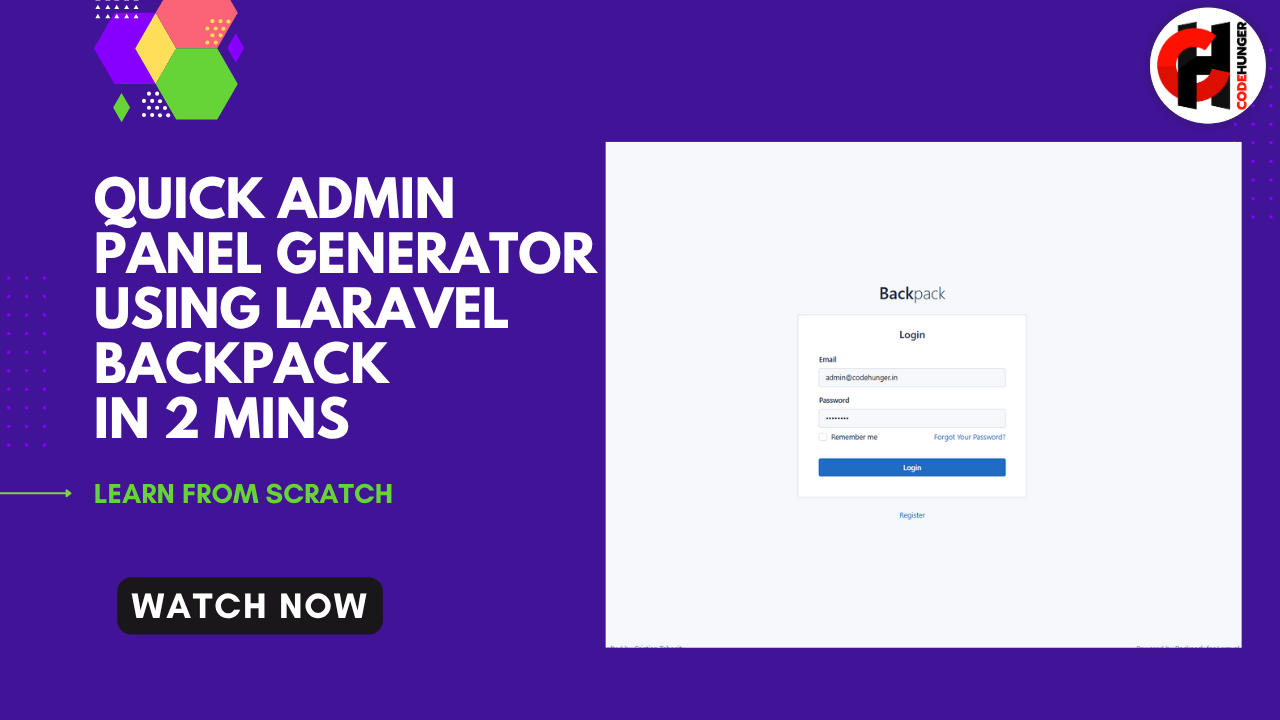
So when you install it using the below given instruction, it will looks like the below image

Looking to build a fast, responsive, and modern admin panel in Laravel without spending hours on setup? Backpack for Laravel has you covered. In this quick guide, you’ll learn how to install Backpack and get an admin panel ready in under 5 minutes.
🧰 Prerequisites
Make sure your system has:
- PHP 8.1 or higher
- Composer
- Laravel 10 or later
- MySQL or SQLite database
- Web server or Laravel’s built-in
artisan serve
🚀 Step-by-Step Installation
Step 1: Create a New Laravel Project
Skip this if you're adding Backpack to an existing Laravel project.
Step 2: Install Backpack Core
Run the following command to add Backpack to your project:
Step 3: Run the Backpack Installer
This command scaffolds the admin panel, routes, and dependencies:
You’ll be asked a few setup questions (like whether to publish custom views or migrate users). Confirm with yes where applicable.
Step 4: Create an Admin User
Backpack provides a quick command to create an admin account:
Enter the name, email, and password when prompted.
Step 5: Launch the Admin Panel
Start the Laravel server:
Visit the admin dashboard in your browser:
Log in using the credentials you just created, and you’re in!
🎉 Done!
You now have a fully functional Laravel admin panel ready for CRUD development, user management, and dashboard customization—all in less than 5 minutes.