In modern web apps, offline-first functionality is becoming essential. IndexedDB allows you to store significant data on the client side, enabling offline access and faster read/write operations.
In this tutorial, you will learn:
✅ What IndexedDB is
✅ How to perform CRUD operations using jQuery
✅ A clear explanation of key code snippets
✅ Integration with Laravel Blade for frontend rendering
🚀 What is IndexedDB? IndexedDB is a low-level, asynchronous, client-side storage API that allows you to store structured data in the browser, including files/blobs. It is ideal for:
🧱 Step 1. Create Laravel Project Plain Bash C++ C# CSS Diff HTML/XML Java JavaScript Markdown PHP Python Ruby SQL composer create-project laravel/laravel indexeddb-crud
cd indexeddb-crud
php artisan serve
✨ Step 2. Create Blade View In resources/views/index.blade.php:
Plain Bash C++ C# CSS Diff HTML/XML Java JavaScript Markdown PHP Python Ruby SQL <!DOCTYPE html>
<html lang="en">
<head>
<meta charset="UTF-8">
<title> IndexedDB CRUD with Laravel and jQuery</title>
<link href="https://cdn.jsdelivr.net/npm/bootstrap@5.3.2/dist/css/bootstrap.min.css" rel="stylesheet">
</head>
<body class="bg-light">
<div class="container py-5">
<div class="card shadow-sm">
<div class="card-header b g-primary text-white">
<h4>IndexedDB CRUD Example</h4>
</div>
<div class="card-body">
<form id="addForm" class="row g-3">
<div class="col-md-5">
<input type="text" id="name" class="form-control" placeholder="Product Name" required>
</div>
<div class="col-md-5">
<input type="number" id="price" class="form-control" placeholder="Price" require d>
</div>
<div class="col-md-2">
<button type="submit" class="btn btn-success w-100"> Add</button>
</div>
</form>
<ul id="productList" class="list-group mt-4"></ul>
</div>
</div>
</div>
<!-- Scripts -->
<script src="https://code.jquery.com/jquery-3.6.0.min.js"></script>
<script>
let db;
let request = indexedDB.open("ProductDB" , 1 );
request.onerror = function(event) {
console .log ("Error opening DB" , event);
};
request.onupgradeneeded = function(event) {
db = event.target.result ;
let objectStore = db.createObjectStore ("products" , { keyPath : "id", autoIncrement : true });
objectStore.createIndex ("name", "name", { unique : false });
objectStore.createIndex ("price" , "price" , { unique : false });
console.log ("DB setup complete" );
};
request.onsuccess = function (event ) {
db = event.target.result ;
console .log ("DB opened" );
displayData();
};
$('#addForm' ).on ('submit', function (e ) {
e.preventDefault ();
let name = $('#name' ).val();
let price = parseFloat ($('#price' ).val ());
// 🔥 KEY CODE EXPLAINED BELOW 🔥
let transaction = db.transaction(["products" ], "readwrite");
let store = transaction.objectStore ("products");
let product = { name : name, price : price };
let addRequest = store.add (product);
addRequest.onsuccess = function() {
$('#name' ).val ('');
$('#price').val('' );
displayData ();
};
});
function displayData () {
$('#productList').empty();
let transaction = db.transaction(["products"], "readonly");
let store = transaction.objectStore("products");
let request = store.openCursor();
request.onsuccess = function(event) {
let cursor = event.target .result ;
if (cursor) {
$('#productList' ).append (
`<li class="list-group-item d-flex justify-content-between align-items-center">
${cursor.value.name} - ₹${cursor.value.price}
<button class="btn btn-sm btn-danger" onclick="deleteProduct(${cur sor.value.id})">Delete</button>
</li>`
);
cursor.continue ();
}
};
}
function deleteProduct (id ) {
let transaction = db.transaction (["products" ], "readwrite" );
let store = transaction.objectStore ("products" );
store.delete (id).onsuccess = function () {
displayData ();
};
}
</script>
</body>
</html>
📝 Step 3. Define Route In routes/web.php:
Plain Bash C++ C# CSS Diff HTML/XML Java JavaScript Markdown PHP Python Ruby SQL Route ::get ('/' , function () {
return view ('index' );
});
🔍 Code Explanation ✅ 1. Creating a Transaction Plain Bash C++ C# CSS Diff HTML/XML Java JavaScript Markdown PHP Python Ruby SQL let transaction = db.transaction (["products" ], "readwrite" );
What it does: Starts a transaction targeting the "products" object store with "readwrite" mode.Why: You need a transaction to perform read or write operations safely.✅ 2. Accessing the Object Store Plain Bash C++ C# CSS Diff HTML/XML Java JavaScript Markdown PHP Python Ruby SQL let store = transaction.objectStore ("products" );
What it does: Retrieves the products object store from the transaction.Why: It’s like selecting a table in SQL before running queries.✅ 3. Adding Data to IndexedDB Plain Bash C++ C# CSS Diff HTML/XML Java JavaScript Markdown PHP Python Ruby SQL let product = { name : name, price : price };
let addRequest = store.add (product);
What it does: Creates a product object and uses store.add() to insert it into the database.Why: Adds a new record to IndexedDB. The addRequest allows attaching onsuccess or onerror handlers.⚡ Final Output
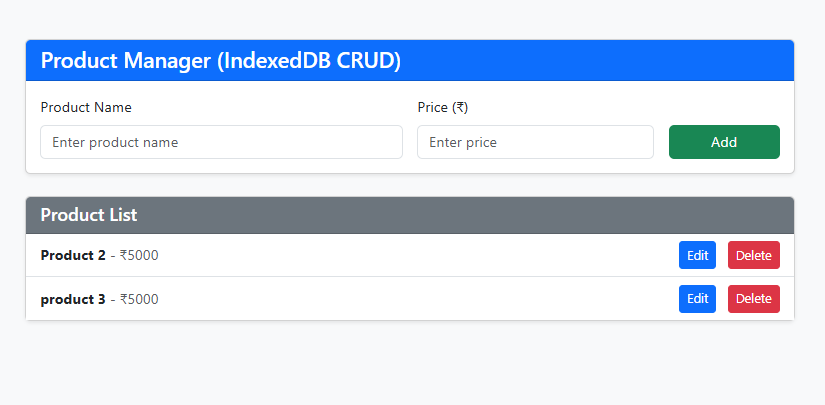
✅ User can add products with name and price
✅ Data is stored locally in IndexedDB (persists after page reload)
✅ Products displayed with delete functionality
💡 Why Use IndexedDB?
🔗 GitHub Repository You can find the full source code for this tutorial on GitHub:
➡️ https://github.com/codehunger-team/crud-using-indexed-db-php-laravel
🎯 Explore the Repository ✅ Clone the project
✅ Run it locally
✅ Customize for your offline-first applications
VIDEO